Installation & User Guide
Step-by-step installation and configuration guide for the Kudosity Salesforce package
)
Installation Guide
Getting Started
Setting up the Kudosity Salesforce integration is a straightforward installation process.
You will need an active, funded Kudosity account with a verified Sender ID to get started.
Ways to send SMS from Salesforce:
Send bulk campaigns to contact groups via the Messaging UI
Automate SMS using Salesforce Flows
Install an SMS conversation panel on any object page for 1-to-1 messaging
Application features include:
Send campaigns from UI to Salesforce objects
Schedule campaigns
Character counter
Message templates
Message personalisation with merge fields
Add SMS conversation panel to objects for 1-to-1 messaging
Real-time conversation replies via websockets
Delivery, Reply & Link Hit Platform Events that can trigger Flows
Send SMS in Flows triggered by record updates or schedules
SMS activity objects & feeds customisable to your reporting needs
Prerequisites
Before installing, confirm you have the right Salesforce edition:
Enterprise
Unlimited
Force.com
Developer
Performance
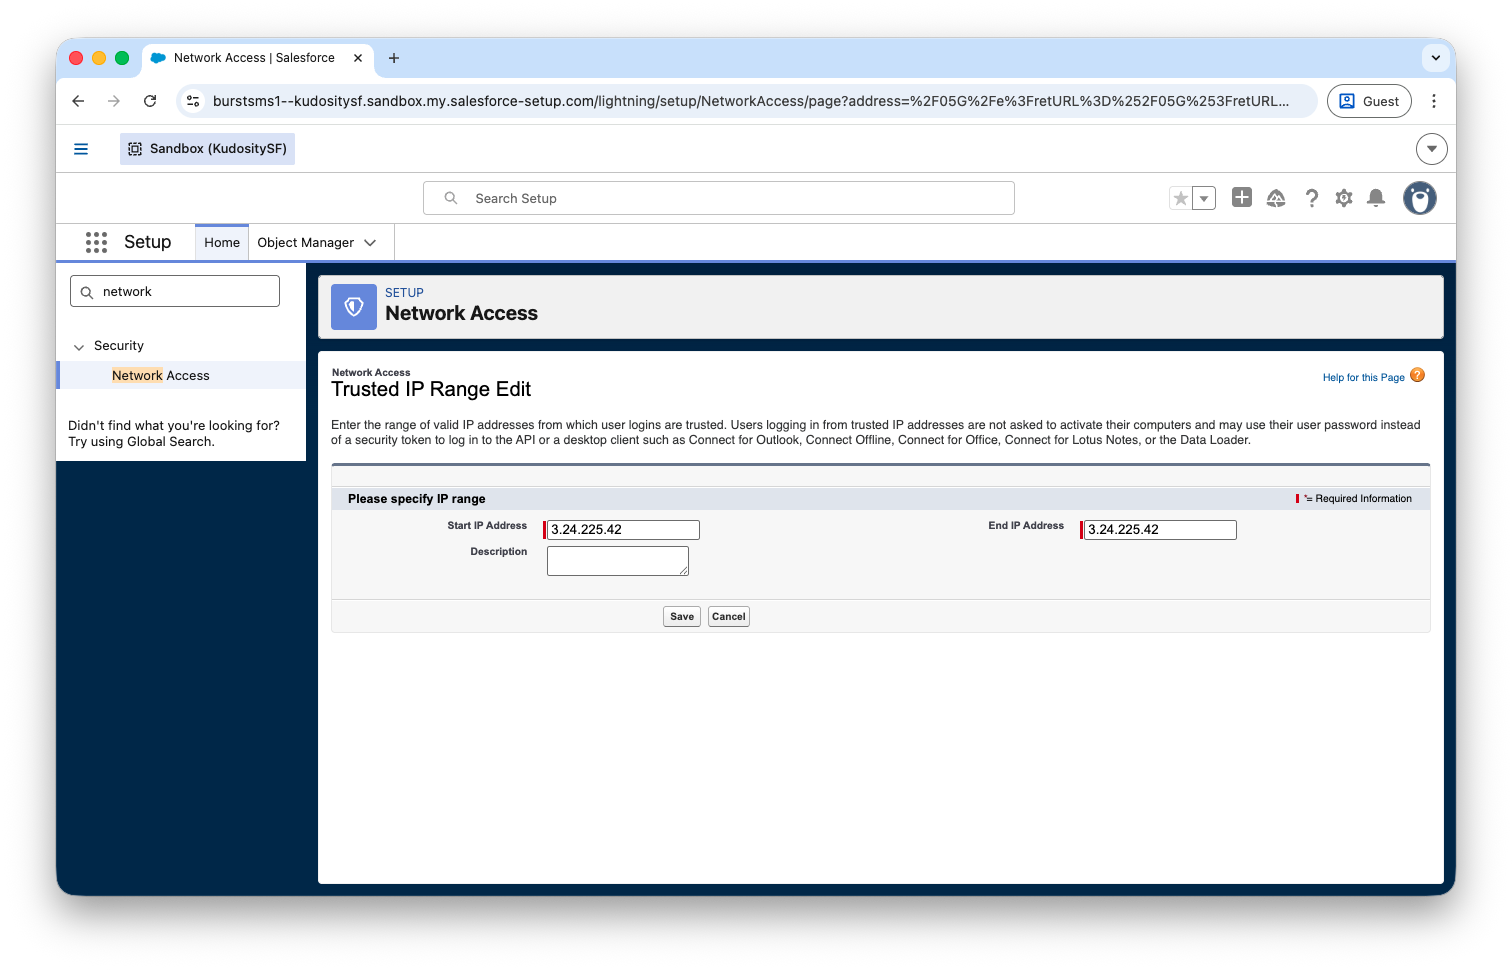
Network Access / IP Whitelisting
If your Salesforce instance uses IP whitelisting, add the following to your Network Access Trusted IP Ranges before installing:
3.24.225.42

13.55.133.33

54.66.106.87
Navigate to Setup → Security → Network Access, then under Users/Profiles click Login IP Ranges and add the addresses above.
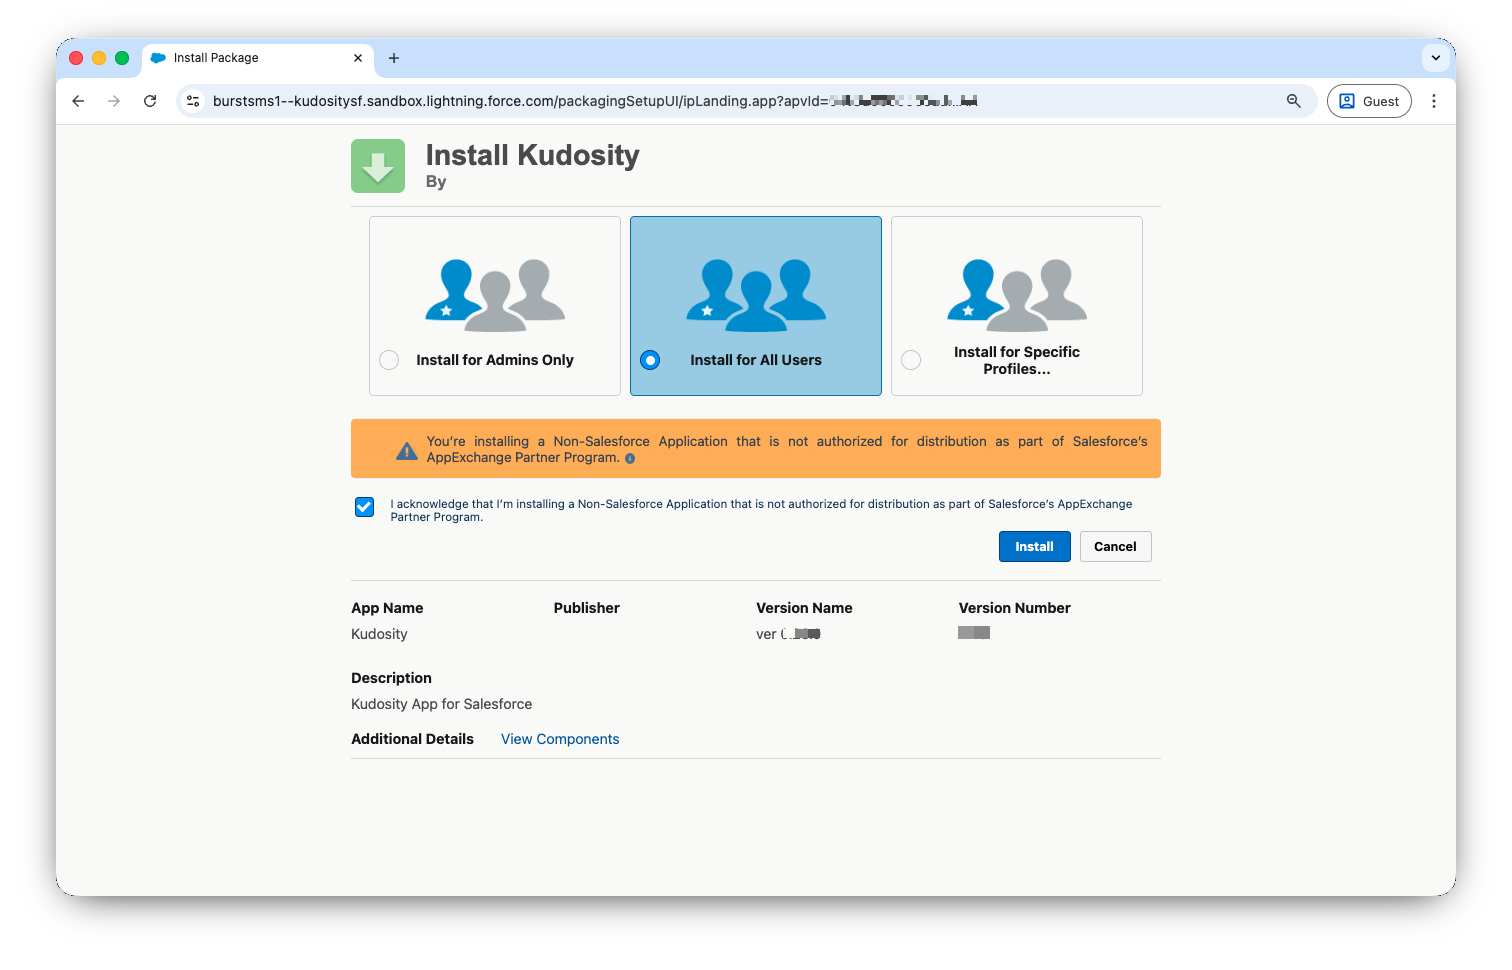
Install the Package
Log in and navigate to the installation URL.
Select Install for All Users.
Acknowledge the non-Salesforce AppExchange warning and click Install.
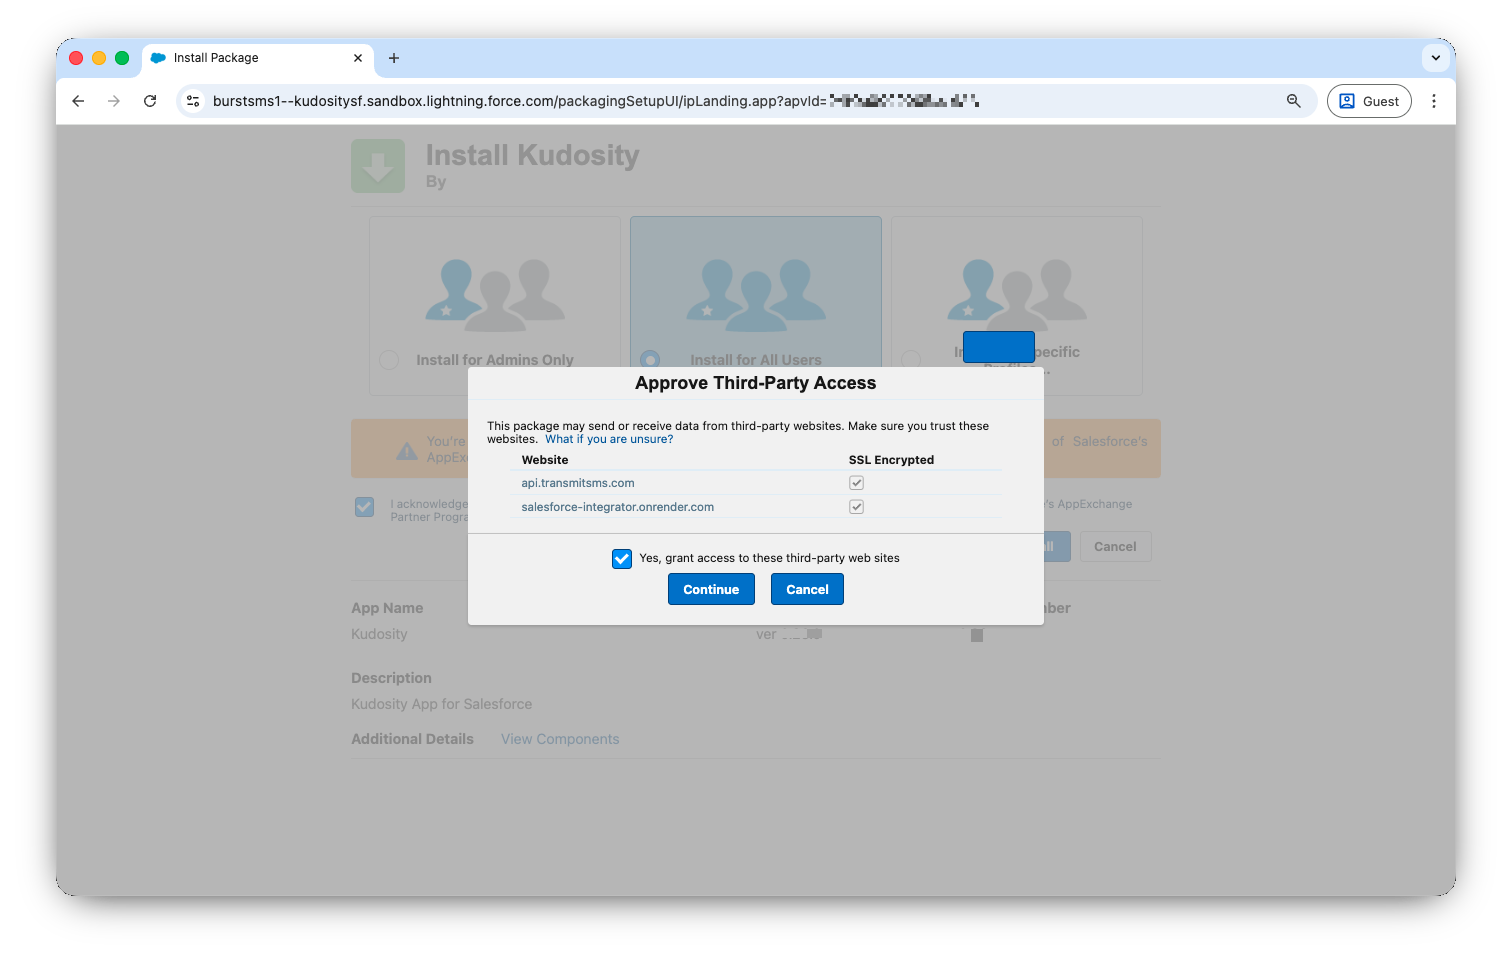
Approve third-party access to the Kudosity API — tick the checkbox and click Continue.
Wait approximately 1 minute for installation to complete, then click Done.
If installation is taking longer than expected, you will receive an email when it completes.
Connect Salesforce to Your Kudosity Account
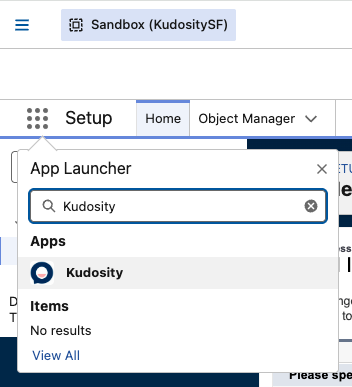
1. Open the App Launcher (9-dot grid icon, top-left navigation bar) and search for Kudosity.
2. Click the Kudosity app result — you will be taken to the setup screen.
3. Navigate to your Kudosity account Settings and copy your API Key and API Secret.
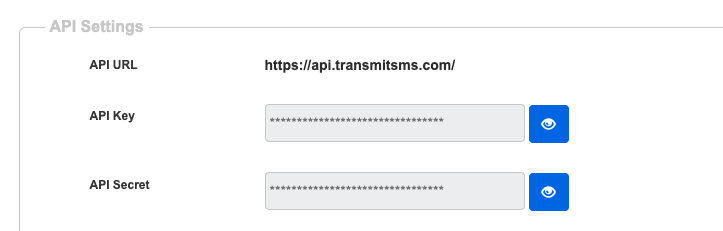
4. Paste your API Key and API Secret into the setup screen and click Connect.


Set Default Country and Sender ID
Once connected, configure your global defaults.
Default Destination Country automatically formats contact mobile numbers into the correct international format for delivery. Where no country is defined on a contact record, this will be used as the fallback.
Default Sender ID pre-selects a Sender ID across your SMS campaigns and conversation screens to streamline workflow. It can be overridden at any time.
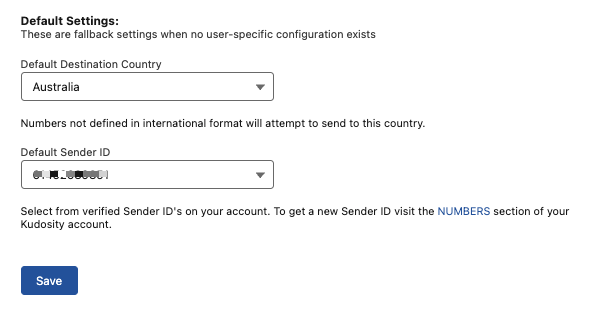
Select your options and click Save.
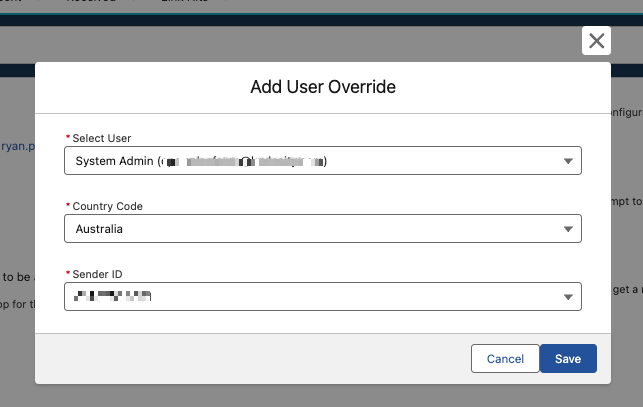
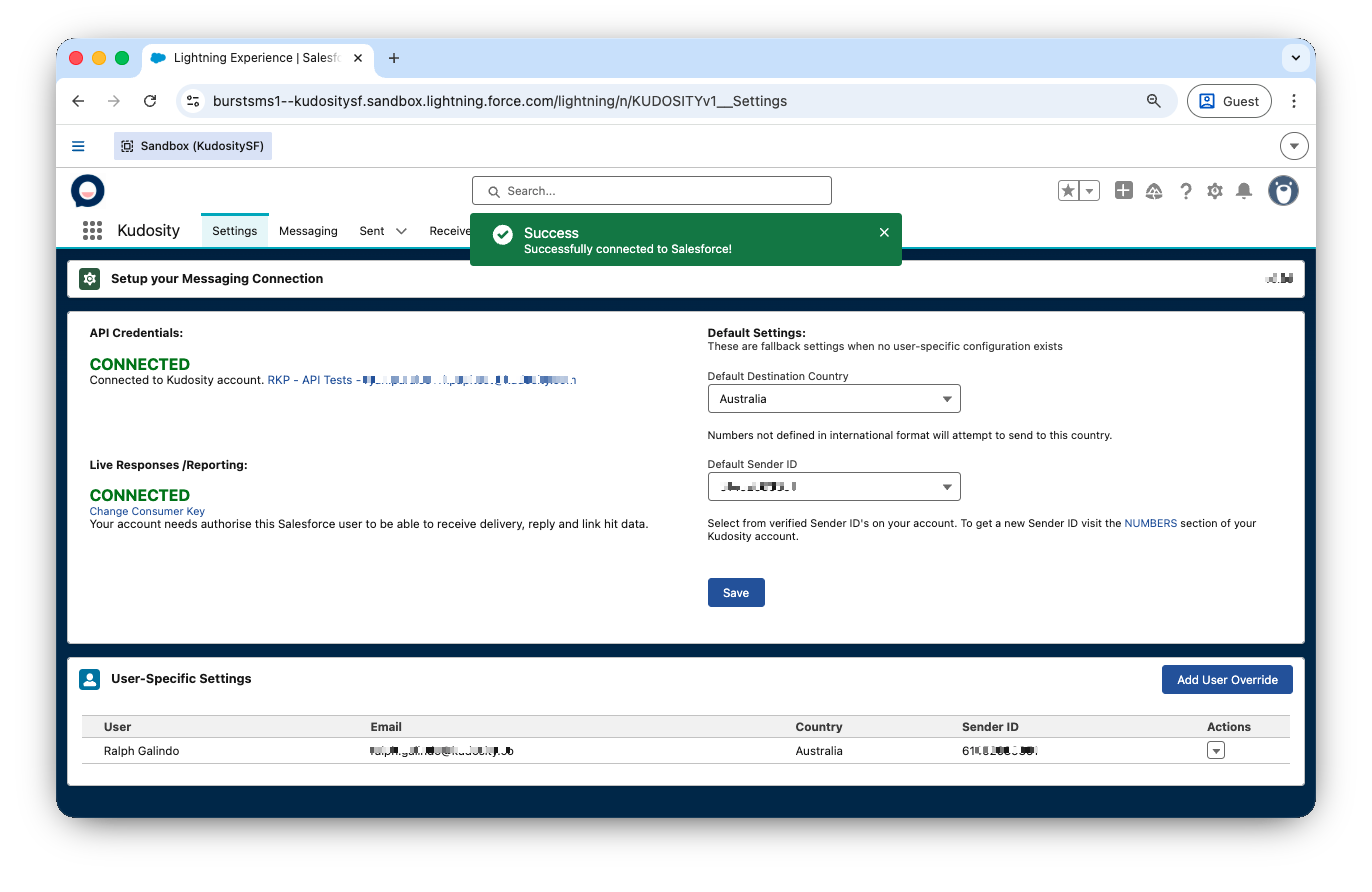
User-Level Sender ID and Country (Admin Feature)
Administrators can assign specific default Sender IDs and Country settings to individual Salesforce users. This ensures users only have access to the Sender IDs appropriate for their role and prevents users from accessing Sender IDs assigned to other team members.
To configure:
In the Kudosity app, navigate to Settings.
Under User Specific Settings, select the user you wish to configure.
Assign their default Sender ID and Country.
Click Save.
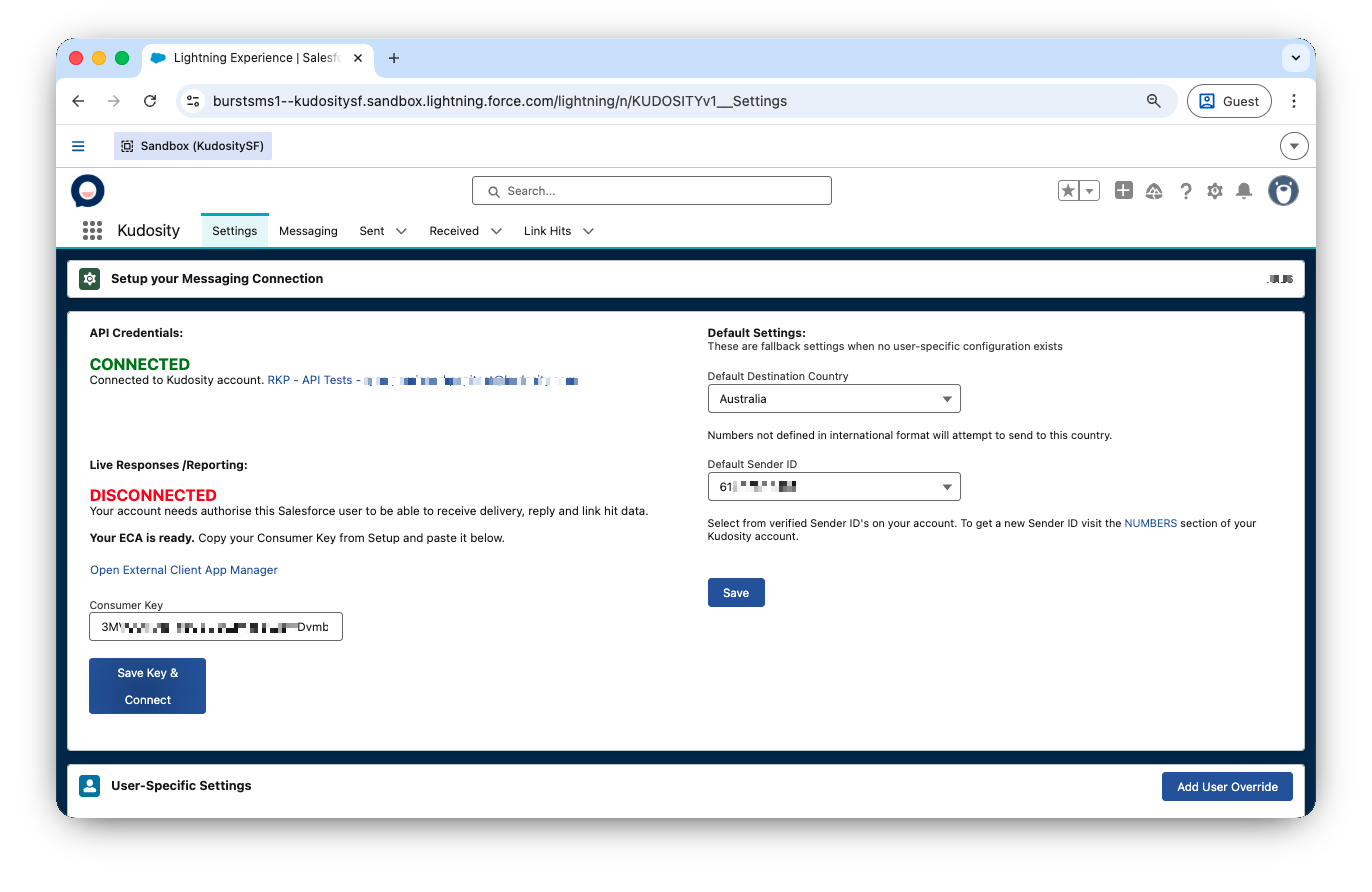
Set Up Live Responses / Reporting (ECA Setup)
This step enables live delivery reporting, inbound replies, and link hit notifications back into Salesforce. This uses Salesforce's External Client App (ECA) framework.
Deploy the External Client App
In the Kudosity setup screen, locate the Live Responses / Reporting section.
If you see a Setup External Client App button, click it.
Wait 30–60 seconds for the spinner to complete — the ECA is being deployed in the background.
Once complete, the screen will show "Your ECA is ready" with a Consumer Key input field.
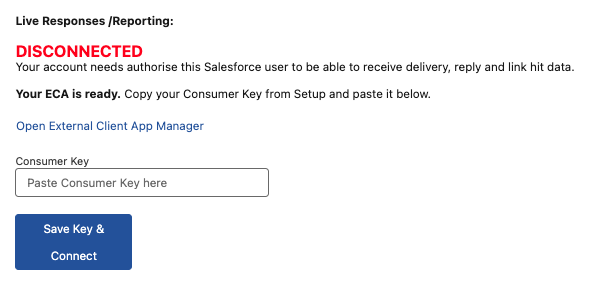
Copy Your Consumer Key
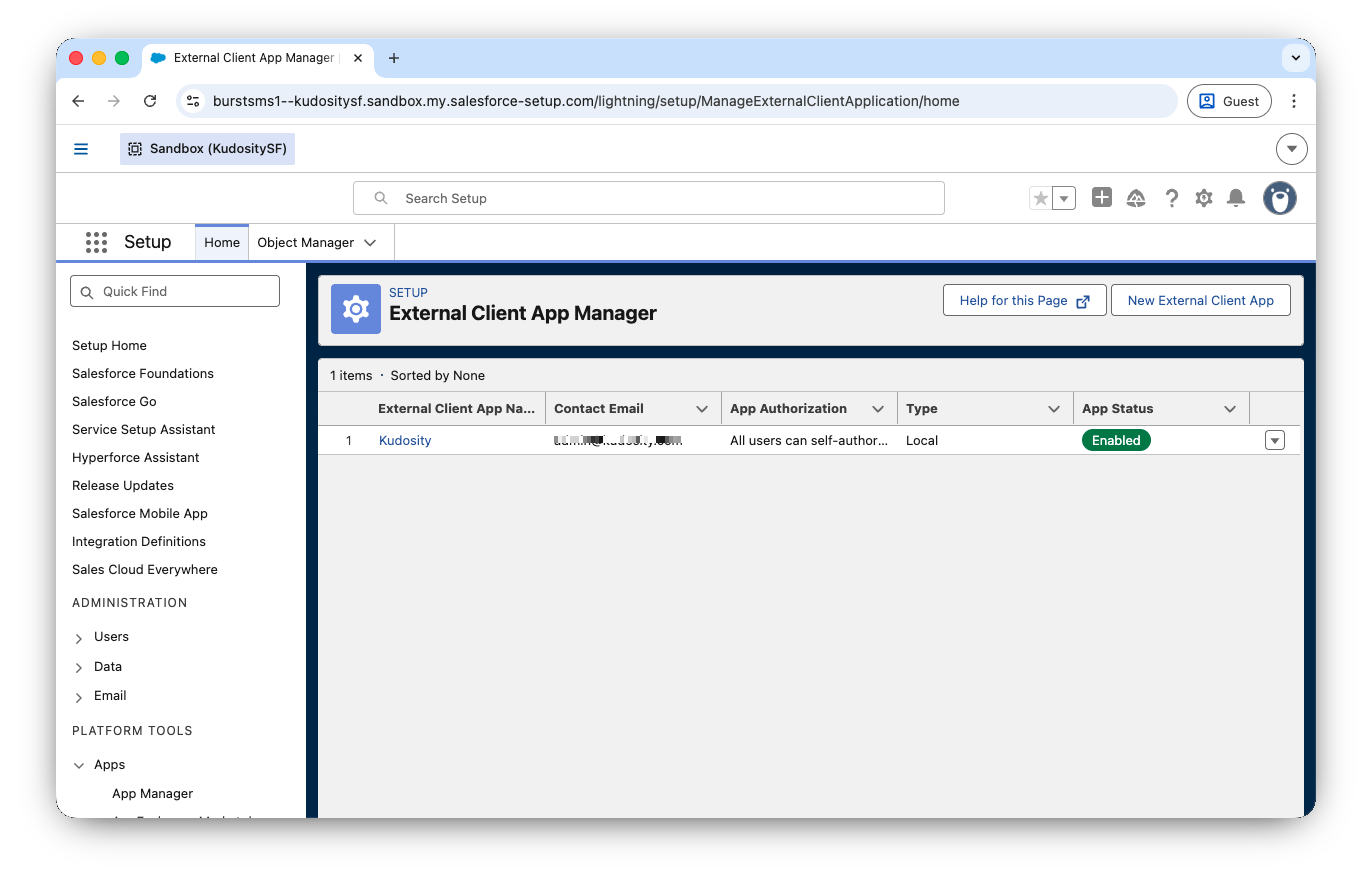
Click Open External Client App Manager — this opens Salesforce Setup in a new tab.
Find Kudosity in the list.
Click View → View Consumer Details.
Authenticate if prompted — Salesforce may send a verification code to your email.
Copy the Consumer Key.

Save Key and Connect
Return to the Kudosity setup screen.
Paste the Consumer Key into the field.
Click Save Key & Connect.
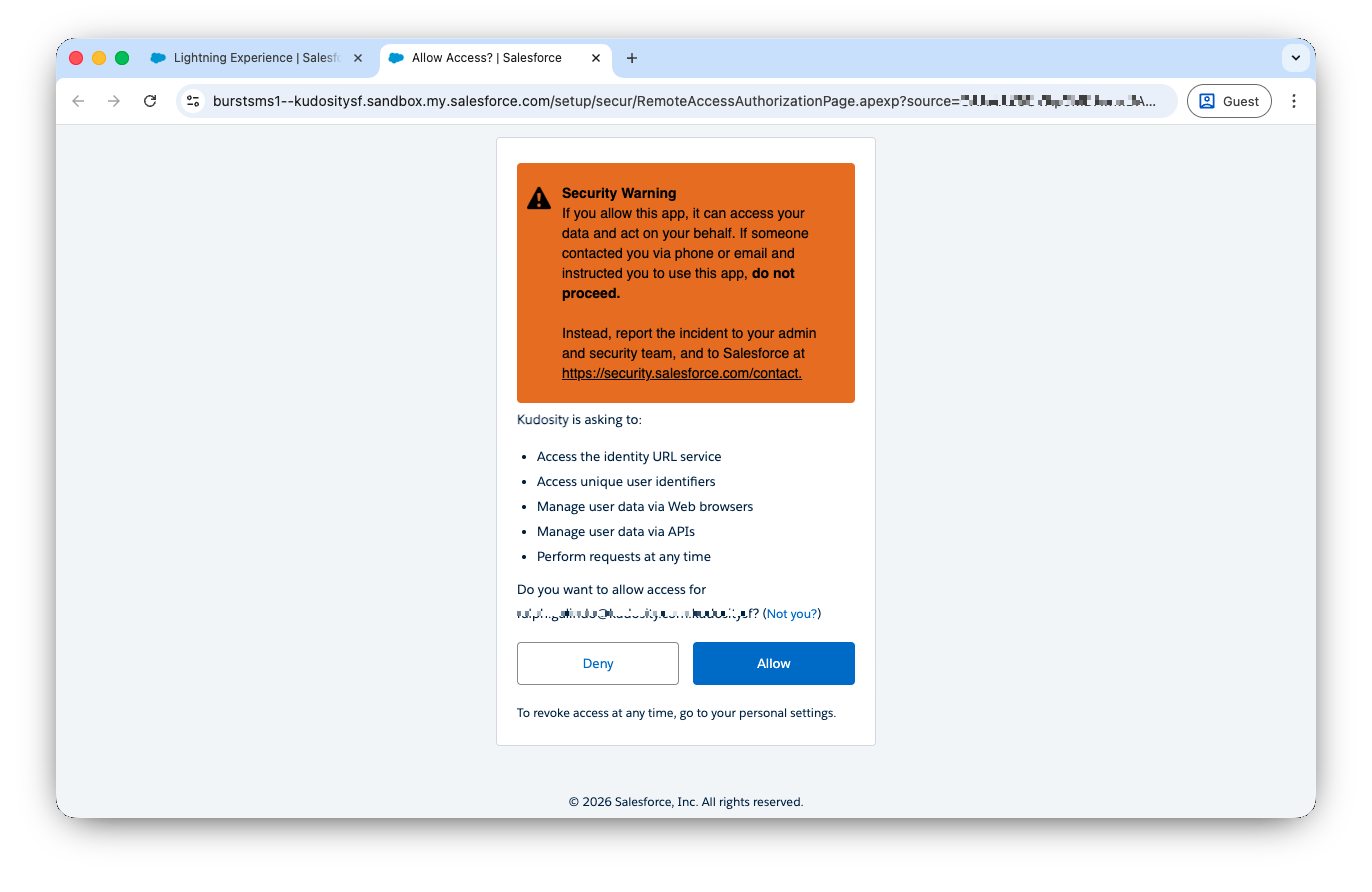
You will be redirected to a Salesforce OAuth consent page — click Allow.
You will be redirected back and Live Responses / Reporting will show CONNECTED.
Troubleshooting ECA Setup
Issue | Resolution |
Spinner times out / VF session bridge error | Click Setup External Client App again to retry |
Already shows CONNECTED with no button | ECA is already set up — no action needed |
Consumer Key field disappears after clicking Open App Manager | The system detected an existing Connected App session — refresh the Kudosity setup screen and check if Live Responses now shows CONNECTED |
Error email received about ECA failing | Go to the Kudosity Config page and click Setup External Client App to retry |
User Guide
Universal Messaging App
From the Messaging tab, you can send SMS to any mobile number associated with Salesforce objects.
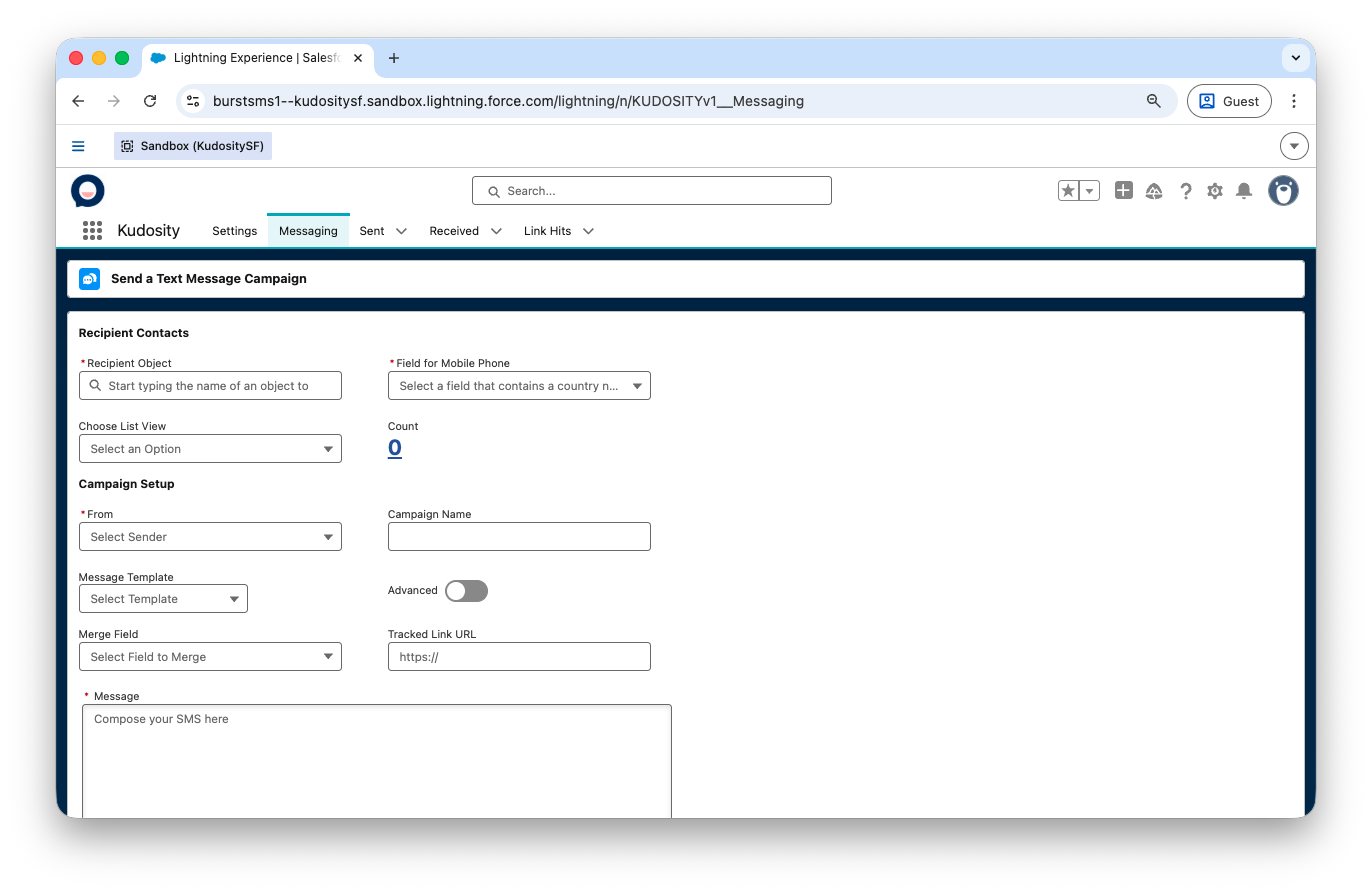
Recipient Contacts
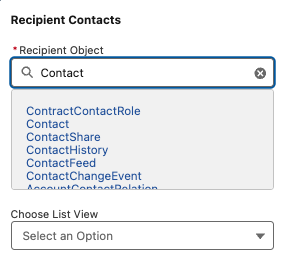
Recipient Object — define your recipient object by typing the object name, for example Lead, Contact, Campaign, or Opportunity.
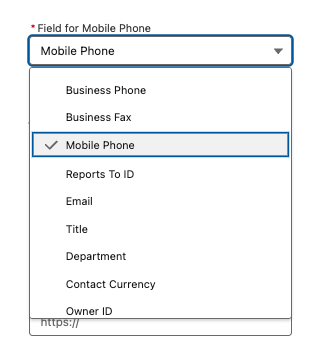
Field for Mobile Number — select the field within your object that holds the mobile number.
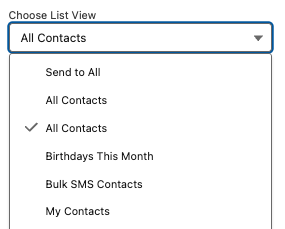
Choose List View / Campaign — refine targeting by selecting a list view or campaign. Views can be filtered to create segmented lists.
Review Message Recipients — click the recipient count to preview who will receive the message, including name, mobile number, and country.

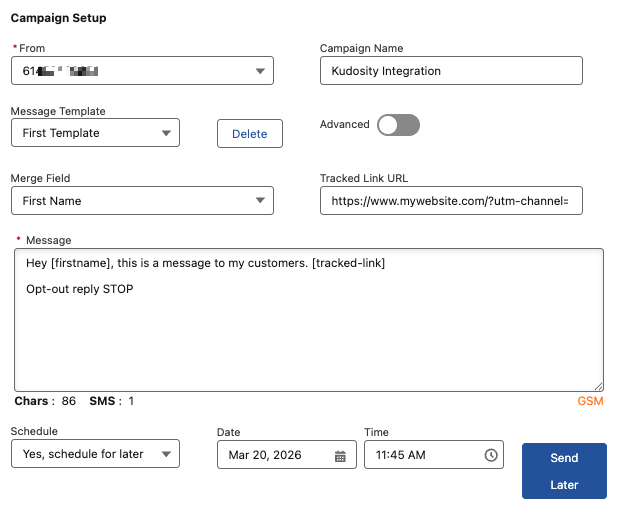
Campaign Setup
From (Sender ID) — select from your verified senders. Your admin may have pre-assigned a default Sender ID to your user. Use a virtual number or short code if you want to receive replies — alphanumeric senders cannot receive replies.
Campaign Name — enter a name to report against later.
Message Template — save messages as reusable templates. Begin typing a message and the Save button will appear. Select saved templates from the dropdown.
Merge Field — personalise messages by merging any field from your selected object, for example First Name.
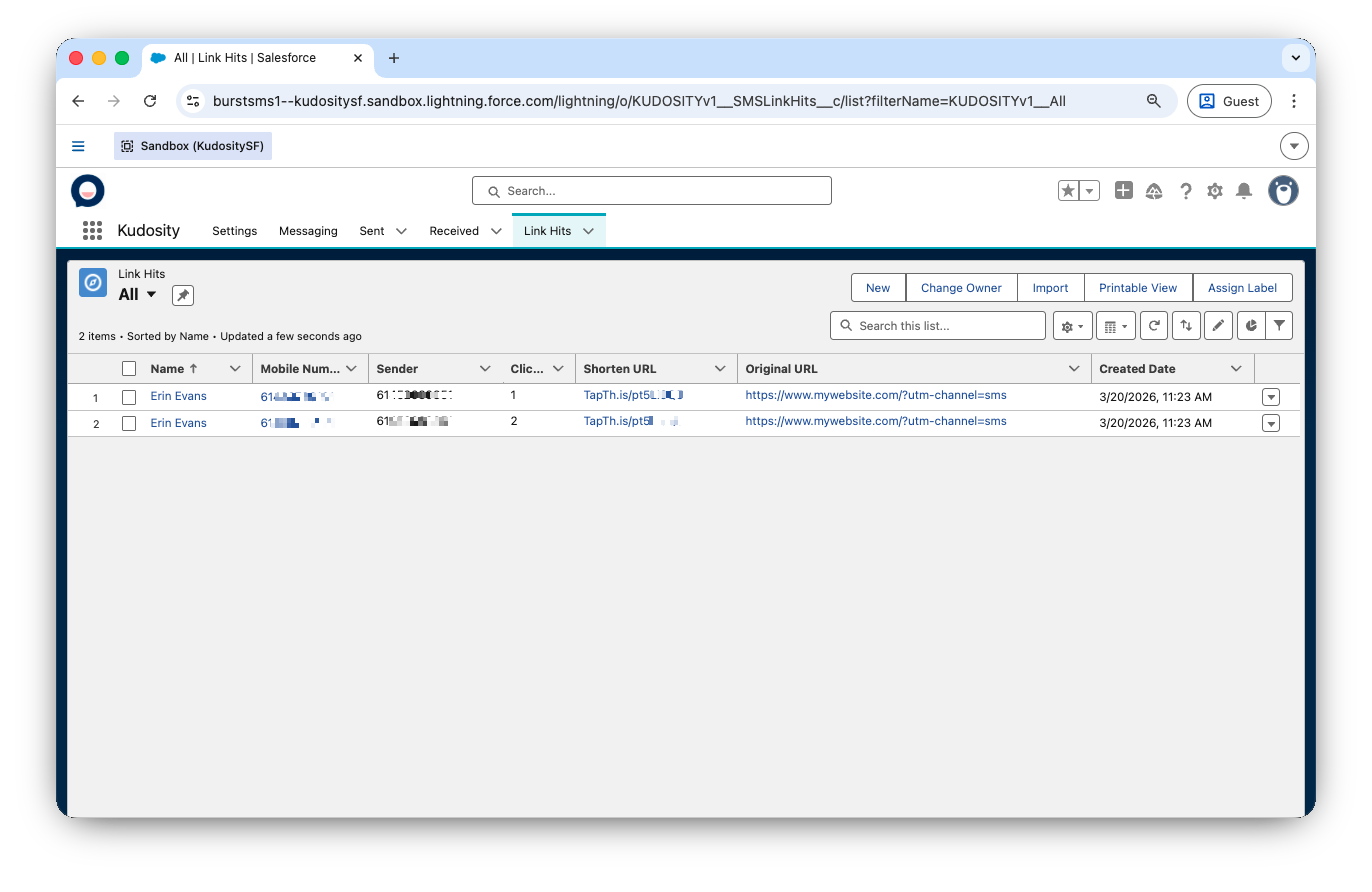
Tracked Link URL — add a URL to automatically generate a tracked short link. The {tracked-link} variable is inserted into your message. Link hits are recorded in the Link Hits tab and on Conversation records, and can trigger Salesforce Flows.
Message — write your SMS here. The character counter calculates UTF-8 lengths automatically. Standard messages are 160 characters; UTF-8 is 70 characters. Maximum 4 parts.
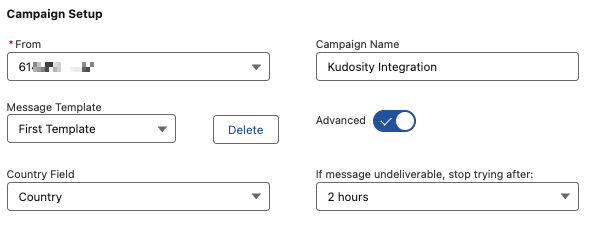
Advanced Campaign Setup
Country Field — optional. Helps format numbers correctly for international delivery.
Undeliverable Message Validity — set a validity period. After this time, undelivered messages will stop retrying.
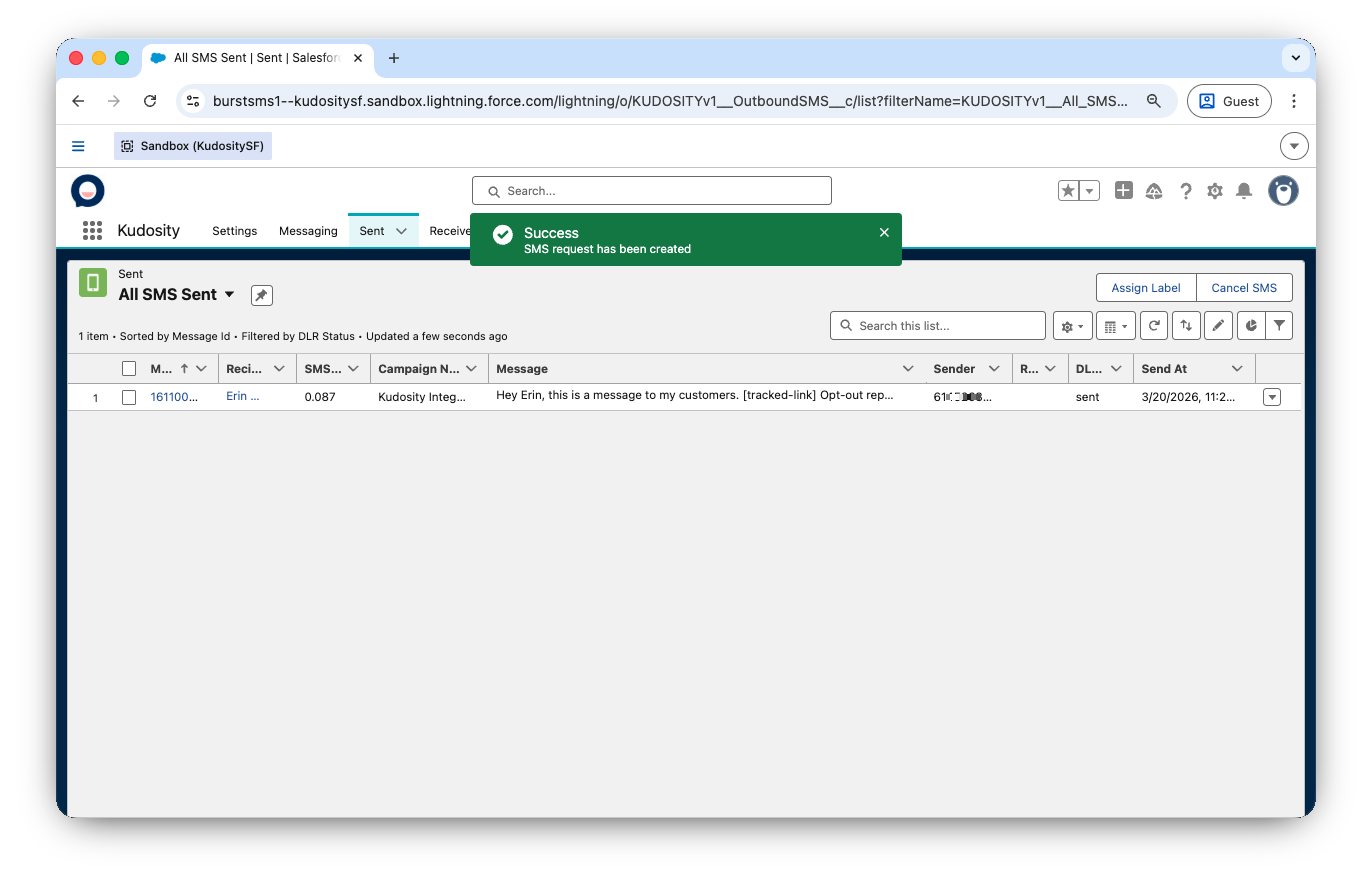
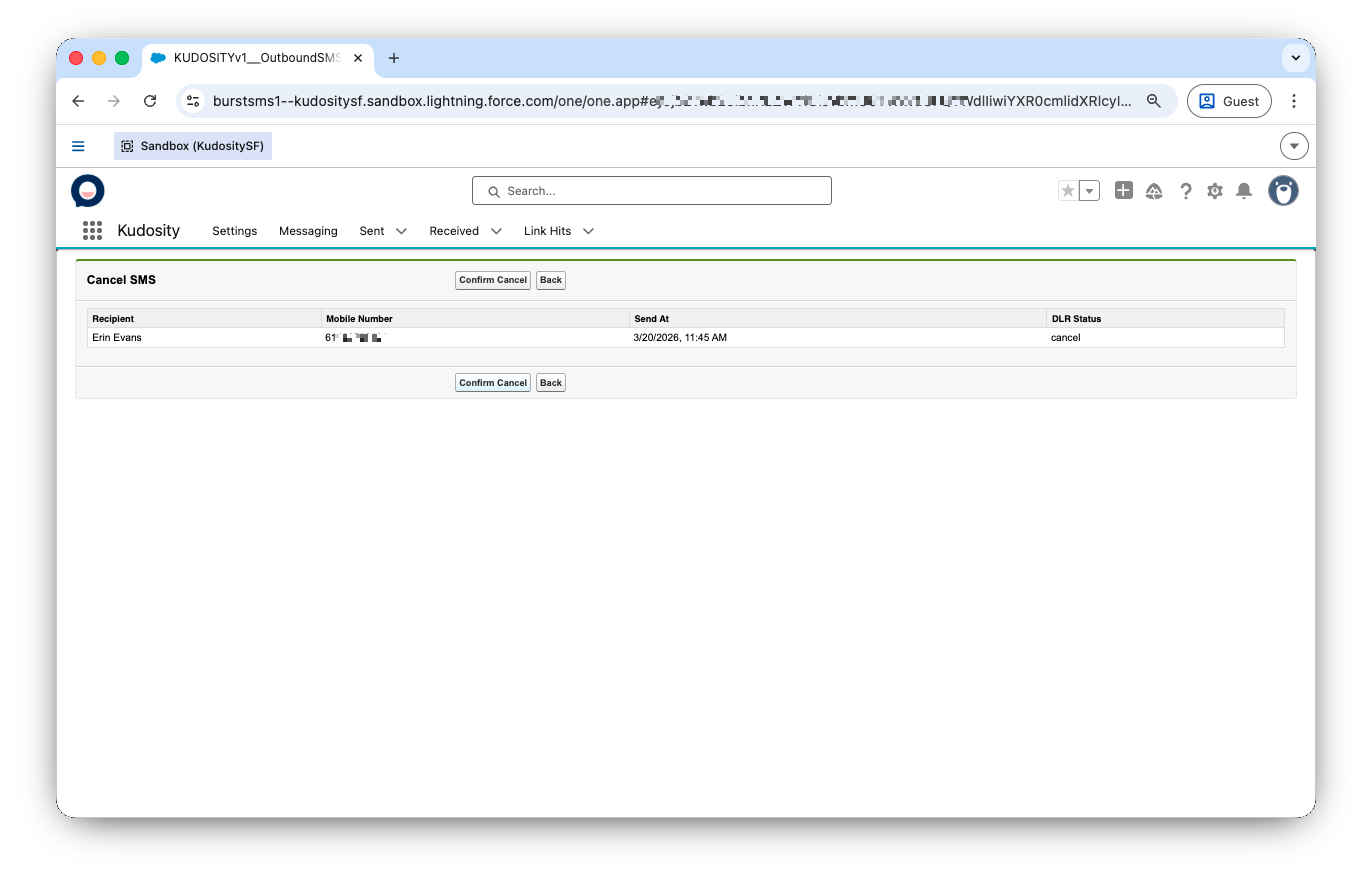
Sent Messages
View all sent and scheduled messages in the Sent tab. Data populates as Kudosity returns live delivery information.
To cancel a scheduled message: select it from the Sent tab → click Cancel SMS → confirm cancellation.
Schedule & Send
Schedule — set a future send date and time. Scheduled messages appear in the Sent tab.
Confirmation — before sending, a confirmation dialog shows the send date/time and recipient count. Double-check and click Send.
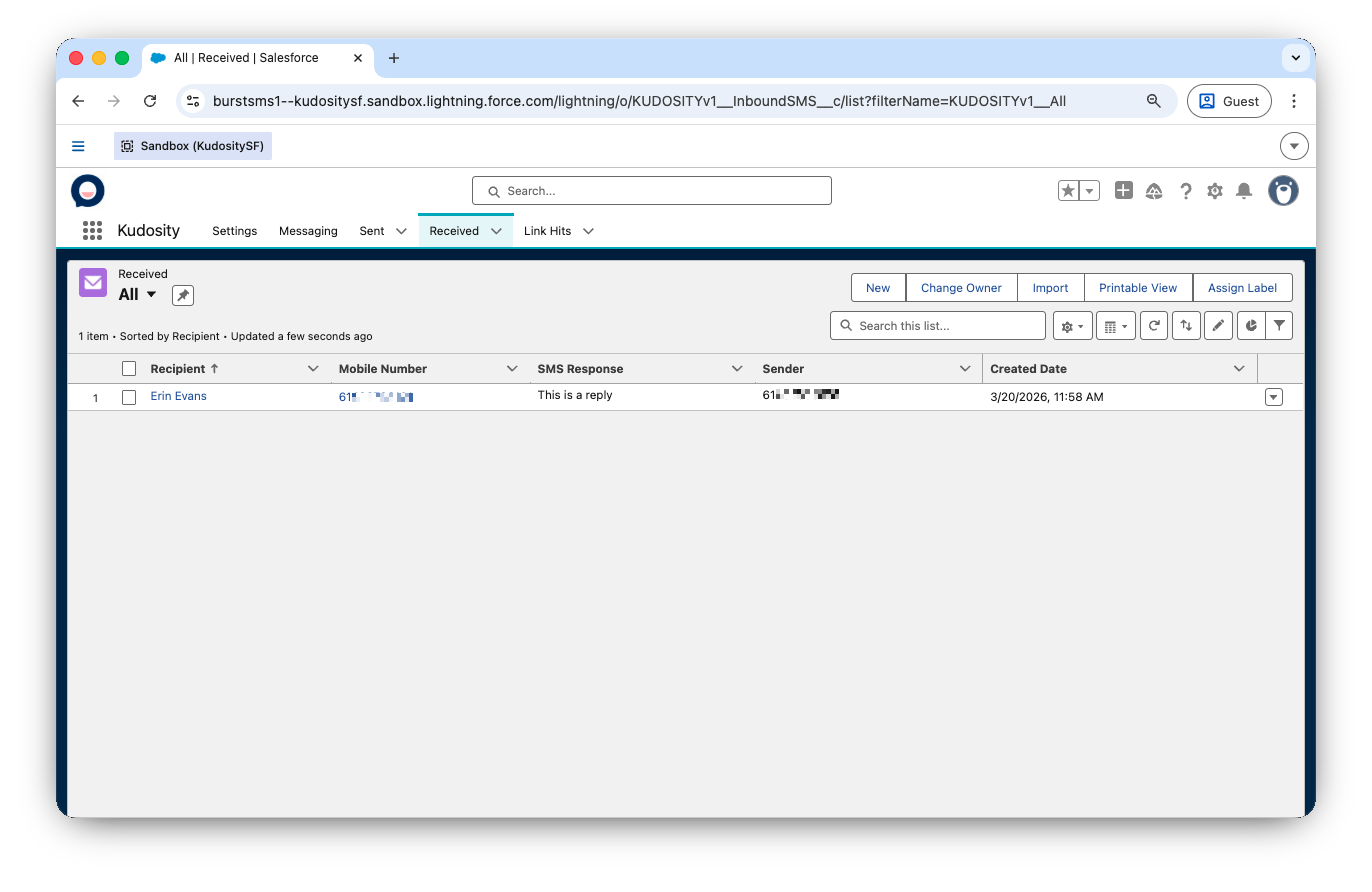
Received Messages & Link Hits
The Received tab shows all inbound replies including emoji responses.
The Link Hits tab shows recipients who clicked a tracked link, including the original and shortened URLs.
More ways to send SMS from Salesforce
Sending Bulk Messages
Send bulk SMS campaigns directly from Salesforce to any object, any list view, with personalisation and delivery tracking.
Automating SMS Workflows
Trigger SMS messages automatically using Salesforce Flows, and use Platform Events to build event-driven messaging sequences.
1-to-1 SMS Conversations
Embed a live SMS conversation panel on any Salesforce object page for real-time 1-to-1 messaging alongside the CRM record.
Need custom integration or consultancy?
Talk to our team for customised Salesforce integrations, workflow automation, and consultancy services tailored to your business needs.
We can connect you with our consultancy partner.
Create your Kudosity account
to activate your Salesforce integration
Instant access. Billed at $49/month add-on.