Bulk SMS from Salesforce
Send bulk SMS campaigns directly from Salesforce to any object, any list view, with personalisation and delivery tracking.
)
Sending Bulk Messages
Getting Started
The Kudosity Universal Messaging App lets you send bulk SMS campaigns directly from Salesforce — to any object, any list view, with full personalisation and delivery tracking. No need to export contacts or switch platforms.
What you can do:
Send to any Salesforce object (Leads, Contacts, Campaigns, Opportunities, and more)
Target by list view or campaign for precise segmentation
Personalise with merge fields
Track deliveries, replies, and link clicks back in Salesforce
Schedule campaigns for future sends
Save message templates for reuse
Prerequisites
Kudosity Salesforce integration is installed and connected
At least one verified Sender ID in your Kudosity account
Contacts in Salesforce with a populated mobile number field
User Guide
Step 1 — Open the Messaging Tab
Open the App Launcher and search for
Kudosity.Click the Kudosity app.
Navigate to the Messaging tab.
Click Send a New Message Campaign.
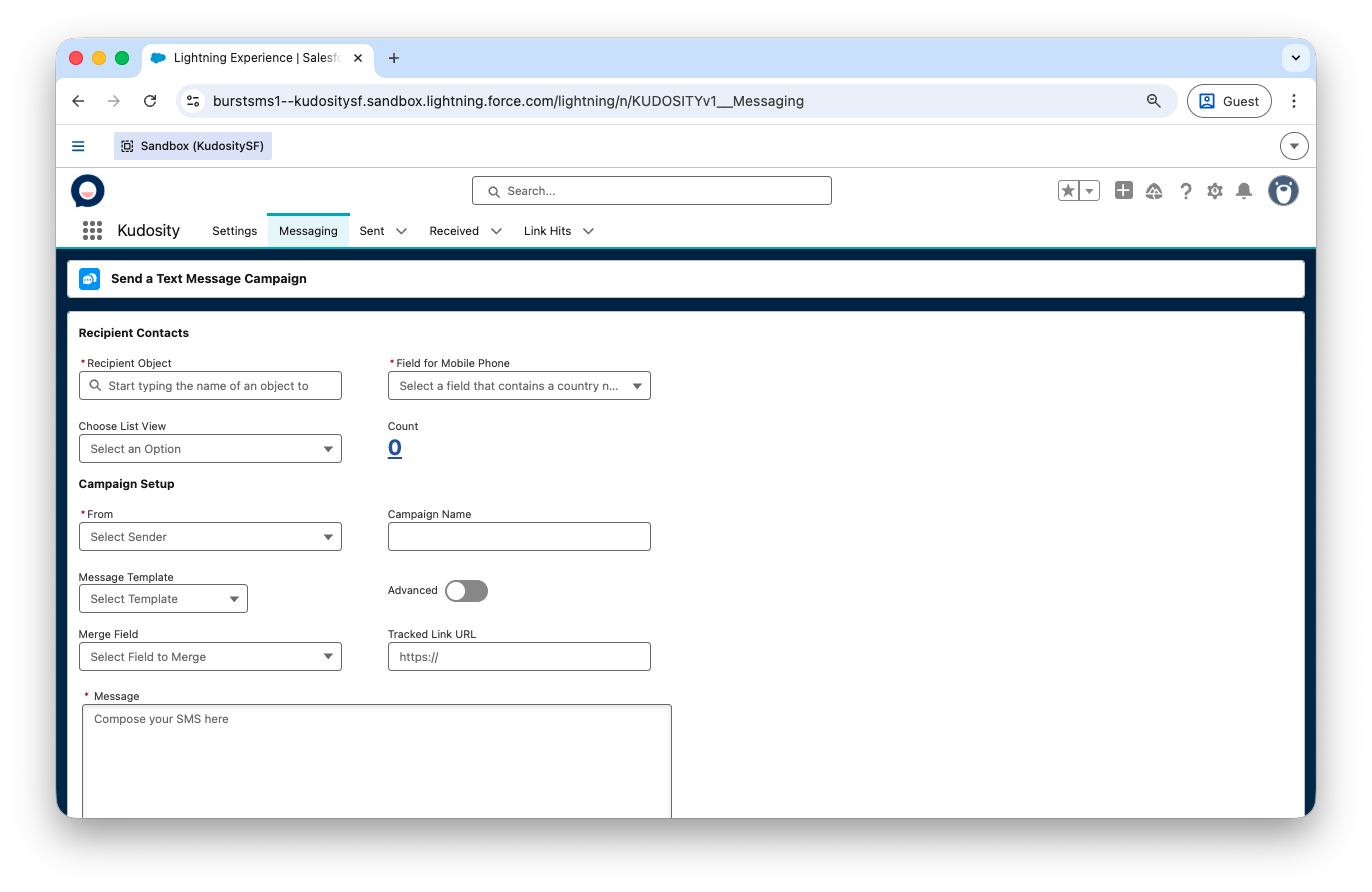
Step 2 — Select Your Recipients
Choose a Recipient Object — type to search for the Salesforce object you want to send to, for example
Contact,Lead, orCampaign.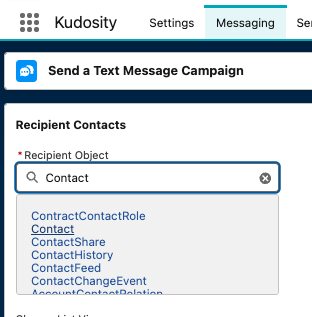
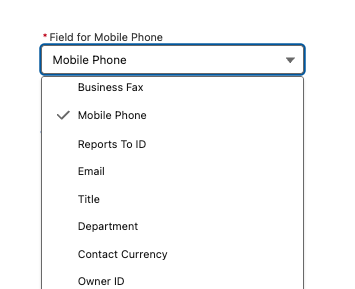
Select the Mobile Number Field — choose the field in your object that holds the recipient's mobile number.
Filter with a List View — use a saved Salesforce list view to target a specific segment. The contact count updates automatically when a view is selected.
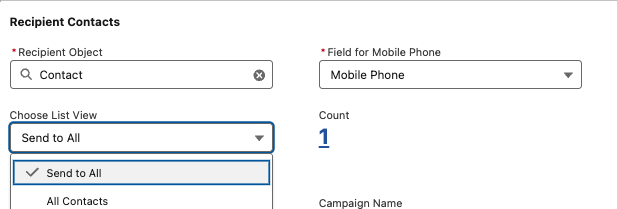
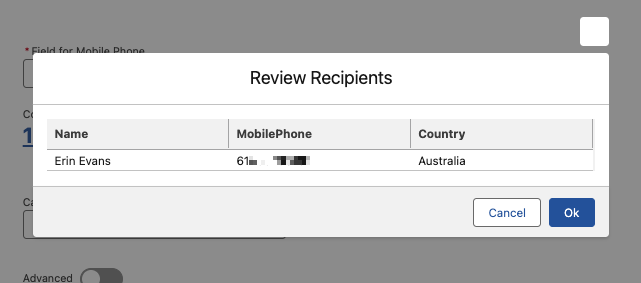
Review Recipients — click the recipient count number to preview the contacts in your send, including name, mobile number, and country.
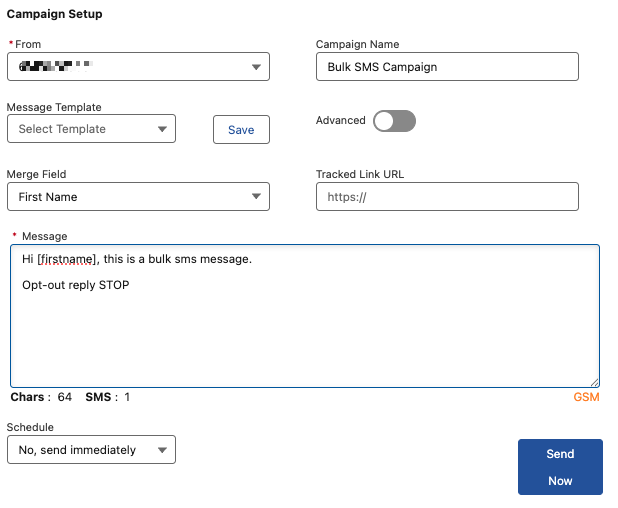
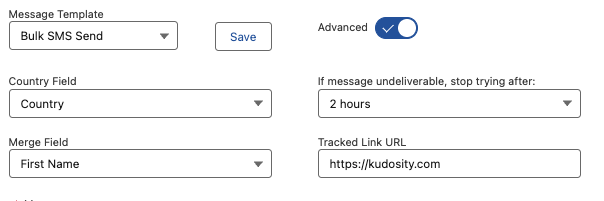
Step 3 — Configure Your Campaign
Sender ID (From) — select from your verified Kudosity senders. Your administrator may have pre-assigned a default Sender ID to your user profile.
 If you use an Alphanumeric Sender, recipients cannot reply. Use a virtual number or short code to enable two-way messaging.
Campaign Name — enter a name. This will appear in your Sent tab reporting.
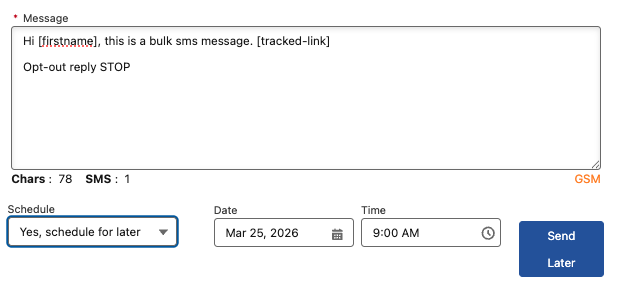
Message Template — start typing your message. Once ready to save, click Save to store it as a reusable template. Select saved templates from the dropdown at any time.
Merge Field — select any field from your recipient object to personalise the message dynamically. For example, selecting
First NameproducesHi [firstname], your order is ready.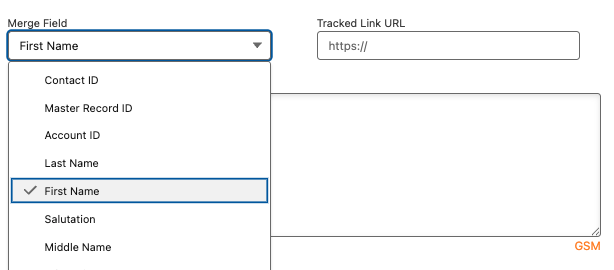
Tracked Link URL — enter a URL to automatically generate a tracked short link. The
{tracked-link}variable is inserted into your message. Link clicks are recorded in the Link Hits tab, stored on individual Conversation records, and can trigger Salesforce Flows via Platform Events.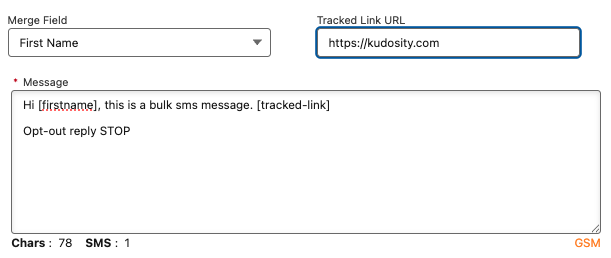
Step 4 — Advanced Settings (Optional)
Country Field — if sending to contacts in multiple countries, select a country lookup field. This helps Kudosity format numbers correctly for international delivery. Your administrator may have set a global default country in the Kudosity app settings.
Undeliverable Message Validity — set a retry window. If a message cannot be delivered within this period, retries will stop.
Validity availability varies by carrier — contact support to confirm for your destination.
Step 5 — Schedule or Send
Send immediately — leave schedule set to No, send immediately and click Send Now.
Schedule for later — select a date and time. Scheduled messages appear in the Sent tab with a Scheduled status.
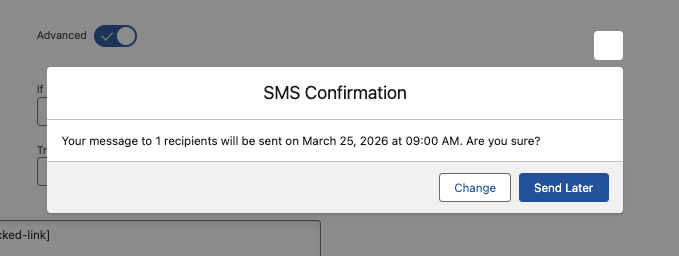
Step 6 — Confirm Your Send
A confirmation dialog shows the number of recipients, the scheduled send date and time, and a message preview. Double-check everything and click Send.
Monitoring Your Campaign
Sent Tab
View all sent and scheduled campaigns. Kudosity updates delivery status in real time as data comes back from carriers.
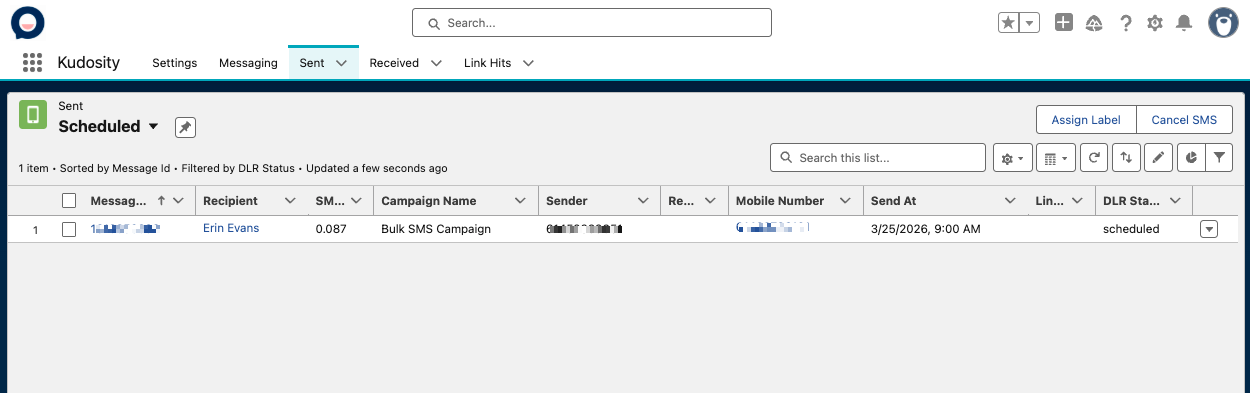
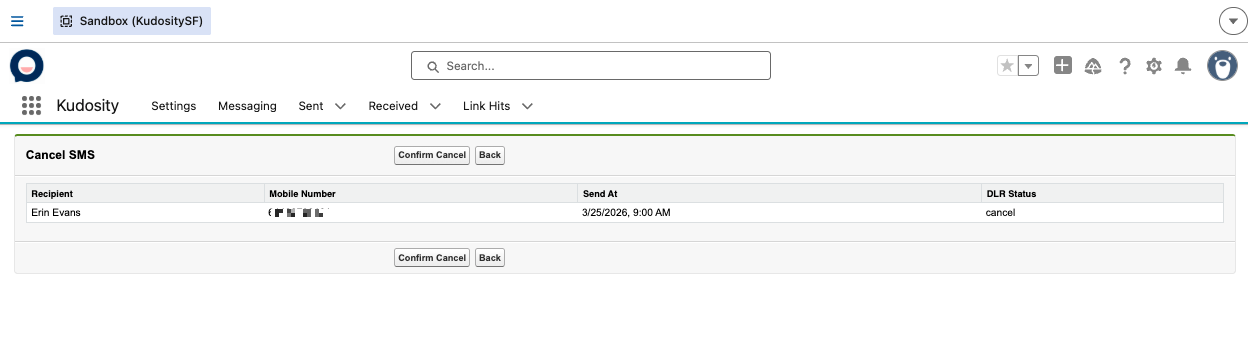
Cancelling a Scheduled Campaign
Go to the Sent tab.
Select the scheduled campaign.
Click Cancel SMS.
Review and confirm.
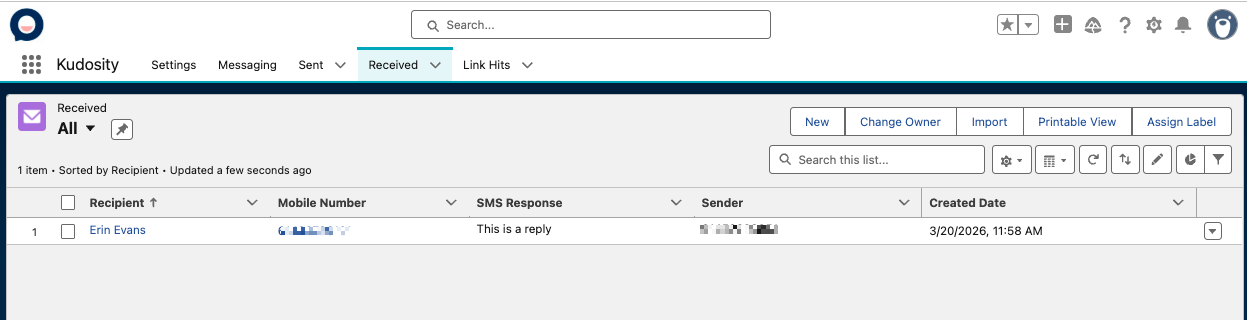
Received Tab
View all inbound replies including emoji responses.
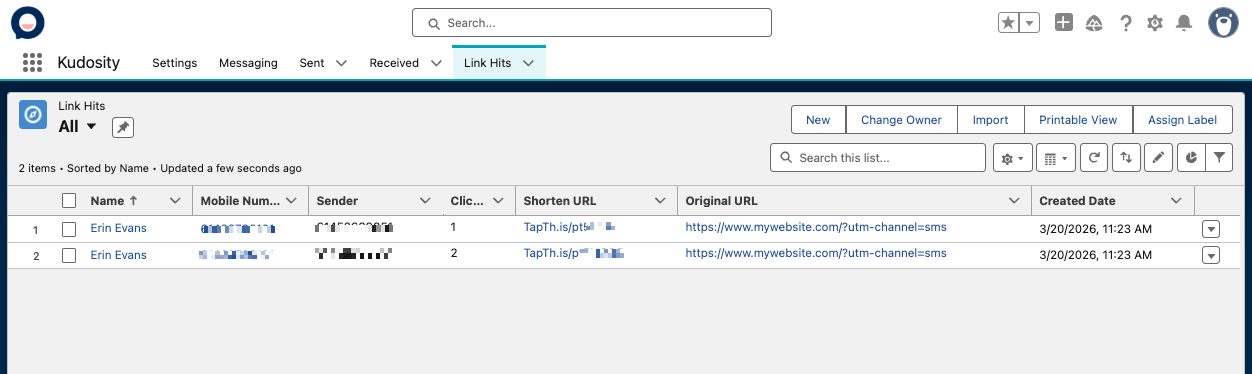
Link Hits Tab
See which recipients clicked your tracked link, including the original URL and the shortened version. Link hit data is also stored on individual Conversation records.
Tips for Better Results
Always use a list view rather than sending to all records — it gives you a contact count before committing to send.
Use Campaign Name on every send to make reporting easier.
Test with a small list view first before sending to your full database.
For international sends, always populate the Country Field to avoid number formatting issues.
Use Alphanumeric Senders for one-way broadcast messages only; use a virtual number when replies are expected.
More ways to send SMS from Salesforce
Installation & User Guide
Step-by-step installation and configuration guide for the Kudosity Salesforce package
Automating SMS Workflows
Trigger SMS messages automatically using Salesforce Flows, and use Platform Events to build event-driven messaging sequences.
1-to-1 SMS Conversations
Embed a live SMS conversation panel on any Salesforce object page for real-time 1-to-1 messaging alongside the CRM record.
Ready to automate SMS in Salesforce?
Get hands-on help from our team for customised Salesforce integrations, or jump straight into the installation guide and set up in minutes.
Activate Salesforce Integration
Instant access. Billed at $49/month add-on.